ABOUT ME

ABOUT ME
ABOUT ME

My Store

My Store
My Store

Free Resources

Free Resources
Free Resources
Showing posts with label FOSS. Show all posts

Quick Air Science Ideas Based on NGSS

Air is all around us. Air moves things, Air interacts with other objects, and Air is an invisible gas that takes up space. Here are a few quick air activities that you can add to your science lessons based on the following K-2nd grade NGSS concepts...

Starting Point: 
Learning about air is the foundation for teaching structure and properties of matter as you learn that air is a gas and takes up space. I teach these mini lessons to my second graders to teach them to plan and conduct investigations to describe how different kinds of materials and objects have observable properties.

The Plan:
I first show them a clear plastic baggie filled with air. I let them know we are going to learn about something very special that can change weather and be very dangerous at times. I have it in the bag. What is in the bag can also move other things and interact with objects. I then show them the bag. Most believe nothing is in the bag, however there is always one that guesses air.

Giving them a plastic bag of their own filled with objects that are light and heavy, flat and 3-D is a great way to then teach properties and what makes them a solid or a gas. (I don't give them liquids at this point) I let them blow with a straw or with their own breath and see how air moves things. I love reading the story The Wind Blew. Perfect for adding in what is a prediction!

Book Connection: The Wind Blew by Pat Hutchins

STEM Connections: I love having the students make a maze to blow a cotton ball through. We also read The Three Pigs and build houses made of blocks to blow down.


Book Connections: The Three Pigs by James Marshall

Air Concept #2:
The framework core ideas that NGSS covers as you teach about air are: ESS2 D Weather and Climate, this is where we build up what is air and how and why can it be part of regulating weather and climate?

The concept air moves things can now be expanded to air interacts with other objects. Tie in weather reports, predicting the weather, and how moving air affects the weather. Observe clouds...create wind socks or pinwheels to observe wind movement.

STEM Connections: blow bubbles to watch the direction the wind is blowing...make your own bubble wand to test it out!

Book Connection: I like to use Feel The Wind by Arthur Dorros

Air Concept #3:
We also tie in a Kindergarten NGSS performance expectation: using and observing weather conditions can help us describe patterns over time. Keeping track of the weather as well as predicting the forecast is a great way to teach that predictions are only a guess. You can also tie in patterns and seasonal changes.

Book Connections: The Boy Who Harnessed the Wind by William Kamkwamba

STEM Connections: This all can tie into ESS3 where students learn about how Earth's surface processes and human activities affect each other. This can work with teaching natural resources such as how we use air as power. Creating wind turbines or boats powered by the wind is a perfect STEM connection!
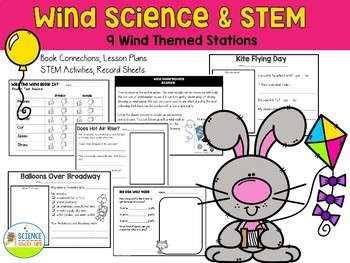
                                      Wind Science and STEM Pack
Looking for a kindergarten through second grade pack that has everything you need? HERE is a great Wind Science and STEM Pack for you!

Looking for something for your older kiddos? Check out this STEM Quick Pick Energy Pack! 
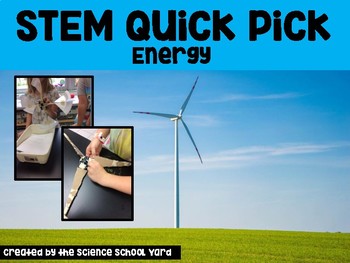
                                      Energy STEM/NGSS Science Quick Pick

Time to air on the side of fun and engaging Science and STEM lessons that tie into NGSS! Whether you use FOSS Air and Weather lessons, NGSS, or TIEKS or anything in between it is always great to find new ideas to add to what you are already doing!

In this post, for your convenience, you may find Amazon Affiliate links to resources. This means that with your purchase of items Amazon will pass on small percentages to me. This will not create extra costs for you at all! It will help me keep this blog running!
Shop Science School Yard TPT store!
0

FOSS and Science Stations

For the 28 years I have been teaching our district has used FOSS as our science program. I am using these kits as I teach my kindergarten through fifth grade students. We have build a pretty solid road map that helps us determine what lesson we are teaching per week to each class. As our district adopted the WI science standards which are almost identical to NGSS, we had to create our new road maps to make sure that each of the standards were covered. That meant that we had to look at consolidating lessons, working them into stations, as well as cutting the FOSS lessons that do not meet our new standards.

We wanted to also make sure that we were adding engineering as well as find ways to study vocabulary, assess our knowledge, and gather grades when we only see our kiddos once a week, for an hour! That means we have to be really creative with our time and we had to learn how to make every lesson and moment count! (Not to mention that we are also needing to help our school math goal in science...I will be sharing in my next post how I am attempting to do just that).

I want to share with you a few strategies that we came up with as we kept the FOSS kits, learned to consolidate and create stations, and found creative ways to work in assessment and vocabulary.

Learning To Consolidate:
As we looked at the time we have with each of our students, looked at the fact that we needed to find ways to show their progress, as well as assess them, we had to find a way to create lessons that were meaty and created a way for our students to retain information.

I focused this year on the 5E model of writing my science lessons!

Using my FOSS lessons, I find a way to engage in what we are going to learn that day. I give them part of the experiment as an introduction or way to explore what we are going to be learning or I give them a way to start to investigate the "experiment" that goes along with the FOSS kit. When students are done with their investigations, some tables are done earlier than others, one method to adding other layers to each lesson is to find ways to have students explain their thinking, use a record sheet to write down what they learned and any observations that they made.
Variables and Castle Storming Station
One way that I use FOSS as an extension is to have students finish an experiment and then take it up a notch. We learned about variables for an example then we made castles to show what we learned!

Elaboration can be done at their tables or even as stations around the room! I love when my learners can get up and move around, get up and be responsible for their ongoing learning, and continue to focus on not only explaining, but elaborating! This might mean a quick STEM challenge, an extension of the experiment, qr code vocabulary games, digital review lessons that I made for each FOSS unit, or a quick game such as task cards or review!
Human Body Leg and Kick Ball Station

If students can get done early, I also add ways for them to continue their learning through games as well! We have to create something at times that can be used to create a fun competition or interactive game to utilize what we are learning at the time! We had to make legs in fourth grade Human Body, why not use what we made to see how our leg muscles react when we kick!

One huge incentive to get done is the ability to elaborate! I also can take the opportunity to help the groups that might need my time, a reteach, or even a way to evaluate their learning!

Setting Up Stations!

Creating stations while using a science kit like FOSS can be a bit time consuming at first, however once you create stations, they can be used over and over again! Check out my FOSS extensions on TPT if you want to find resources to elaborate!

Station Ideas:
1. vocabulary review
2. experiment sheets
3. assessment
4. ticket out the door
5. digital recordings and picture explanations
6. STEM connections
7. extension sheets
8. math connections
9. Book creator or adobe spark
10. digital activities and review
11. task cards
12. reading connections
13. writing connections
14. maker space
15. meeting with small groups

Stations can be used after your initial introduction lesson. They can also be used to consolidate smaller activities and experiments as well. Finding ways to add stations can help you find ways to meet with groups to check for understanding as well as guide them if they are struggling.

Assessment and Vocabulary Review Stations

A great way to add a quick review is to use games that incorporate vocabulary and questions that we have been asked during an experiment or that they will see on an assessment.


I love using qr codes for a quick review and assessment. QR codes are great because they can check what they know after trying to answer the questions first. They can also have a partner and see who can answer the question first. You can have them answer the questions then use the qr code to review what they know.

I also think ticket out the door is important as a quick way to check for understanding. I use digital sheets that they can place in our Itslearning site (like Google Classroom) or they can air drop their screen shot of their sheet for me to see where they are at. I also check it at the door if we are needing a quick check and go! Here is the resource that I created and use with my 2nd-5th graders!


Use FOSS in your classroom? Please share any ideas and strategies that you use for extensions, elaborations, and evaluations. We can all use some great ideas!

Shop Science School Yard TPT store!
0

Electricity Lessons That Help Learners Shine

Each year we start and electricity unit which allows students the ability to work hands on and to problem solve as a group...that to me is so electrifying.

The major focus in our electricity unit is to learn about the parts of a circuit. Whether that be the source meaning... the battery... the pathway... meaning the wires or the receiver which can be either the light bulbs or a motor.

We want them to be able to figure out ways to problem solve by learning what an opened and closed circuit is! We also want them to be able to work together to create a way for a switch to turn on and off the light or motor better yet... as we develop our skills in putting a circuit together  we can even add how to be able to work with insulators and conductors! 

 I love giving them a bag of insulators and conductors for them to test from spoons to sponges washers to paper clips they are able to connect and understand that all metal objects are conductors! 

The next big focus is to understand the difference between parallel and series circuits! By adding different light  bulbs to our circuit we can see the difference between the two, We really emphasize that series circuits work together one after the other after the other... just like a series of books or movies!  I like to use movies or favorite books like Avengers.  It sure can get kids to connect to the understanding of the difference between series and parallel easier!

 Here’s how I did it: Series vs. Parallel

For series circuits... I like the different types of movies that are put together one after the other so that if you miss one movie you might miss something really important in the story line. Why do Captain America and Iron Man have an issue with each other for example. 

For parallel circuits...We can look at the movie Avengers and see that there’s a parallel universe that can work separately from each other. What other movies show two things happening simultaneously without interference? That is the key to making those connections!

Think about a Series of Unfortunate Events. If you miss one of  the books, you might miss out of something that happened that led to it coming up in another book.  Using movies and books to be able to share the difference between a concept that might be a little bit more difficult is an important strategy to use in any classroom setting. 

Adding lesson such as static electricity as well as electromagnets are also really fun and hands-on ways to help students understand the concepts of electricity as well as magnetism and how they can go hand in hand. 

One of my new found favorites to finish up the unit...bristle bots.  I was able to use grant money to purchase this kits from Brown Dog Gadgets called Bristle Bots. There are some great step by stem picture tutorials that we used from PBS Kids site with video help, too!  


I love ending the school year with this unit because when these kids are so worn out from being tested they can be able to really work to gather any fun and engaging way trying to find an electricity pack that can work for you grab this pack below right here!
Electricity Unit and Resources


Hope I helped you find ways to add electricity activities to your science lessons. Thanks for joining me in the Science School Yard!
Shop Science School Yard TPT store!
0

Creepy Crawley Insect Ideas

Those creepy crawley insects! I love to bring insects into the classroom to help my students learn about the life cycles of different animals.

You can find ants outside  or you can find crickets at your local pet store. I have to say I absolutely love crickets for the purpose of showing students even at a young age of first grade the difference between a male and a female. A female has an ovipositor in between the circe at the back of their body.  This shows where the eggs are deposited from and the males are the only ones that make that sound to attract females. The other thing about crickets is to be able to show that some of our animals we are investigating are nocturnal! They have ways to protect themselves such as camouflage or big back legs to be able to jump. Give crickets a try!


You can even purchase butterfly larva or find some other insects around your yard to be able to bring in for students to see under hand lenses and the crème de la crème of insects are those fun little meal worms you can get for fishing! They are perfect for being able to let students see the three different changes from larva... to pupa... to adult. I even give each one of my students a vile so they can have a class pet to be able to watch and feed and even take for a walk on a plate! They love it when that darkling beetle is ready to be released, too! We have a fun release party for them so they can be in their natural habitat! And don't forget their is always the ant or bee to learn about! 

Not only can you bring in insects but it’s great to find tadpole eggs or watch the raptors on the Decorah eagle site. The best time to do this in in February when the eggs are in the nest. Right now in June the eaglets are almost the same size as the mother eagle! (note: the babies fell from the perch and are both at the raptor rescue center. ) 

It is also really great to be able to connect plant life cycles so that students can see a variety of ways that animals and plants go through their life cycle and metamorphosis to change and grow. A fast growing plant for kids to see are radishes or even peas! The good ole' bean is perfect as well! 

Are you needing to find a quick science lesson for your Littles how about pick up this insect pack and your sheets and activities are all set to go perfect for inside or outside. Find your Insect Pack HERE!
Insect Science Pack


Shop Science School Yard TPT store!
0

Who Stole the Cookies Chromatography Lab

You know when you have a little extra time to fill in  your day? Okay...that rarely happens, however this week our fifth graders went on an overnight trip to what we call school forest leaving me with only one fifth grade class to teach this week instead of two. So I got to figure out a lesson that was not something I normally teach during our Mixtures and Solutions unit. I already taught my students the lesson on chemical reactions, so why not figure out a chromatography lesson to extend the excitement!

Chromatography is the separation of mixtures into their individual components so this is perfect for a mixtures and solutions unit!


Scientists use chromatography in many ways. They use it to test the level of alcohol in the body. They can figure out a crime by testing and analyzing blood and cloth samples. Arson verification is another way chromatography is used by identifying the chemicals responsible for a fire and to rule out foul play. It is even used to determine drugs and poisons in the body in the hospital.

To make it age appropriate and to help them learn about real world science through hands on investigations I made Who stole the cookies? This is a way for us to separate different markers, but in a story like way. I picked four co-workers, the janitor, librarian, art teacher, and music teacher who I asked if it would be okay to be a part of my story. With a yes from all...I set up the folders.

Time to give out the folders with a note inside that says "Thanks for the cookies!" The students use the evidence to prove who it might have been. This team cut the note and then wrote the same word to test if it would bleed out in the same way.


I wanted to pick four black markers , one for each person. The librarian got the VisaVi that she might use on the overhead, the janitor got the Sharpie because he labels boxes to leave the school, the music teacher got the Expo marker because she puts the notes on the board, and the art teacher got the Crayola markers for art projects. This evidence after testing the note eliminates two suspects because permanent markers do not bleed. Notice the difference in the markers below!


Expo and Sharpies don't bleed!

Crayola and Visa Vi markers do...this one points to...


This activity allows me to add another lesson or two to our Mixtures and Solutions unit we do with our FOSS kits! I use the rest of these lessons in an after school class as well as on line to get kids doing things at home!

The best part...I added a ton more activities based on color that I will be using right before ST. Patrick's Day..stay tuned for another post!

Interested in a fun and quick lesson on Chromatography and Color to get your kids excited about science? Grab the Chromatography Lab HERE!
       
Shop Science School Yard TPT store!
0

4 Great Ideas To Teach Chemical Reactions

Teaching 6 different grade levels has me covering a lot of different science topics and concepts. Whether it be a certain standard that you need to cover or just need some ideas for what to do in science this week, I have you covered. I will be sharing a new blog series that will help you find ways to make Science child's play!

Kids love chemical reactions however, I think they are always waiting for something to explode. You can easily find ways to cover the NGSS concept of structures of matter...more specifically chemical vs. physical change...without anyone or anything blowing up!

Four Ways to Cover Chemical Reactions and Structures of Matter:

1. Vocabulary (always key to comprehending a concept)

In order for students to really grasp the idea of what they see or don't see, you need to focus on helping them understand the vocabulary words they will be hearing as well as demonstrating.

Some quick ideas:
1. anchor chart and sticky tab draw what you know. Have one side of the room draw Physical changes and the other side draw chemical changes

2. Digital review games which you can find HERE {Digital Chemical and Physical Reaction Review}

3. Task Card and QR code Scoot games which you can find HERE {Mixtures and Solutions Task Cards}

4. Lapbooks which you can find HERE {Mixtures and Solutions Lapbook}


2. Fun and Engaging Activities That Are Easy to Show

Grab some dollar store glow sticks and teach the concept behind how they glow and you have your first idea.

Grab Cranberry Juice, citric acid, and baking soda and you are onto your second idea!

Grab some pennies and some liquids and show how acids clean pennies in this quick chemical reaction activity! Make sure you have ketchup because it does an amazingly quick job getting any patina off of a penny! I also love vinegar, baking soda and water, Coke, window cleaner, and water as a control. You can always add different liquids that you have.

3. Set Up Experiments That Use Everyday Household Materials

Bath Bombs are all the "bomb"! With any holiday from Mother's Day to Christmas you can make this with your kiddos and send home a little gift!

All you need:

¾ cup Epson Salt
½ cup Kosher Salt
¼ cup baking soda
3-5 drops of essential oils
food coloring

container/baggie to hold the salts

Another fun favorite is Silly Putty! For this polymer you need: (yes, polymer which you can read all about in this great Science Buddies Link not to mention a few more ideas)

Silly Putty Recipe:

¼ cup white glue
2 TB Laundry Soap(have extra)
cup
Steps:
1.Mix
2.Knead (if sticky add more laundry soap)

And don't forget good ole' Oobleck or Slime! Oobleck is a great way to teach non-Newtonian Fluids and all you need is corn starch and water and a little food coloring!  Find the pack full of fun Oobleck Connections HERE.

4.  Physical and Chemical Reaction Observations

Now, I have to say we use the FOSS mixtures and solutions kit for our chemical experiments, but if you don't have this kit then here are some great ideas for quick and easy chemical reaction observations that are inexpensive and kids love them!

I use open and closed systems as a way to compare a plastic baggie and a cup with vinegar and baking soda because they are able to understand the difference.

You can also teach Natural Disasters and how humans can protect themselves by making volcanoes. All you need is baking soda and vinegar!

-Create boats that are propelled by baking soda and vinegar which is another creative take on these two ingredients, but with a STEM twist!

 Sign up for my newsletter and get this experiment free in my Science School Yard Library!
-I love Mentos and Coke as well as Alka Seltzer and Water in old film canisters, too! Find the Alka Seltzer Rocket Lab HERE!
https://www.teacherspayteachers.com/Product/Alka-Seltzer-Rockets-881021

It is always hard to find easy and affordable ideas to teach a concept such as structures of matter, but with a little creativity and some help from the Science School Yard, you can find easy ways to teach chemical reactions! Know any other easy chemical reaction recipes or demonstrations you use? Share below. We would love to add to our list with your help!
Shop Science School Yard TPT store!
0

6 Skeletal System Game Ideas for Studying Bones!

I have been trying hard to NOT get frustrated with my students' lack of effort in studying for my science concepts that I am trying to teach! I pride myself at my entertaining nature...I have become quite an actress up front of the room getting them excited about what I am teaching. I see them look at me and I think they are really getting it...and then we take a test and whaawhaa...not good results.

For the last two weeks, my fourth graders have been learning about the skeletal system and let's just say it is never easy to help them memorize and remember the major bones of the human body. I came up with a theme this year...Game of Bones where each event that we do will lead up to us building a Mr. Bones puzzle found in our FOSS Human Body Kit. I also found several patterns on line that would work, too! Here are some game ideas that I use to help my students retain information better!

Game Idea #1:

I first give them tricks for remembering the bones of the body. For example, we wiggle our pelvis like Elvis. We drive a car with our "car"pels. We make a U with our ulna...hitting it below the elbow and saying ulna. We make a hut, hut sound and crouch down like a football player and say "football femur". We make a V by our clavicle with our hands...we pat...our patella...I have a trick for them all!

Once I explain all of the different moves, we play a little Simon Says. This always gets them actively engaged and moving!

Game Idea #2:

Another game we play is Bones...Get To The Point. I give them the picture of the skeletal system or they use Mr. Bones that we constructed. I then say a bone out loud randomly and with a partner they try to point to the correct bone first. I also give them a sheet that has all of the names of the bones listed that is included in our FOSS kit. They tally which person was able to get it right. A little Game of Bones to add to the overall fun we can have learning about the skeletal system.

Game Idea #3:

Now it is time for us to play Name That Bone. I hang up posters of the skeletal system and have an arrow pointing to a bone. They try to figure out what bone it is and then they check the correct answer with the qr code reader. We have a record sheet to write down our guess before we check to assure they aren't just scanning and then moving on without truly studying...not that they would do that...right?

Our final Game of Bones activity allows us to look at not just the bones, but to learn how the skeletal system helps protect, help with movement, and give structure. I give them the question sheet, give them the question cards and we once again test what we know.

Game Idea #4:

I am adding a bonus game we used to figure out protection, movement, and structure. I give them a code on the board for them to solve within a period of time... they fill in the bones with the correct answers which they can use as a study guide!


Want to save time if you are teaching this? I have all of these games ready for you in a pack! The Skeletal System Review Game Pack! Found HERE!

Game Idea #5

I thought it might be fun to include a fun freebie for game idea 5!

I use a decoder for another game! Want your students to remember facts, but having to take notes isn't very engaging...make it more fun by having them have to find the answers in a given time...if they do it they get to build a skeleton for example during a skeletal system unit...each activity that they are doing can add more bones to the skeleton! The Game of Bones my friends!  So for this one...if they solve the three hidden words that show the functions of the skeletal system. I give them six minutes. If they can't do it in time, they can always take a chance and spin the wheel! Try the link for a wheel decide yes or no! Not so defeating if they can't get it, and a 50/50 chance is better than nothing!  Yes or No Wheel of Chance

Game Idea #6

We then create a scavenger on the internet for a part of a lapbook they can build. Inside the picture of the skeleton with arrows pointing to bones. They can hunt for these on a site such as Anatomy Arcade. This is a great way for them to review using the internet. They can label their diagram in their mini- lapbook included in today's freebie! Sign up today for your free pack or check your inbox if you are already part of my newsletter subscribers the email was sent today! I will also put it in our Free Resources Secret Page. Get the secret code when you sign up! Lots of great resources being added!


No Bones about it...making a science lesson more engaging can really help students retain information!

Shop Science School Yard TPT store!
0
Powered by Blogger.